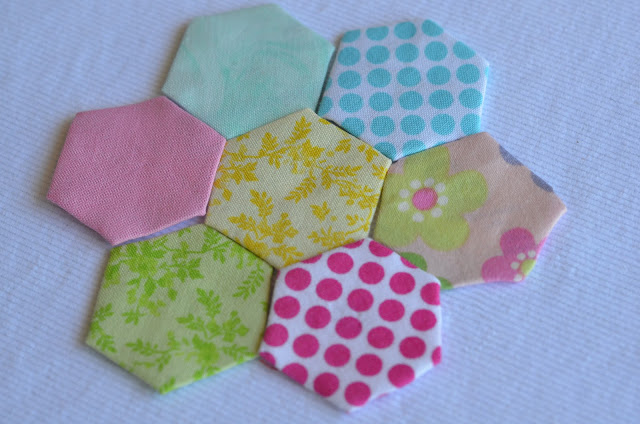
I have recently made some items using some fabric hexagons and have had quite a bit of interest and great comments on them. I thought it would be nice to share a free tutorial on making fabric hexagons and how to connect them with you here as well. Here is my easy-to-follow tutorial for you!
Materials Needed:
Some fabric scraps
Some thread
A hand-stitching needle
Some pins
A pair of scissors
A piece of paper with hexagon shapes on it (You can generally re-use these hexagon pieces. Especially some shopping catalogue pages cut into hexagon shapes work really well for this project)
* I have come up with some printable hexagon templates in five different sizes for you. Choose the size that you would like to work with and print it out. (I used 2.5 inch hexagons for this tutorial):
1. Cut out your hexagon shapes.
2. Cut a little hole in the middle of your hexagon shaped paper. To do that, you can just fold your hexagon in half and cut a triangular shape in the centre (when you open it, it becomes a little diamond shaped hole).
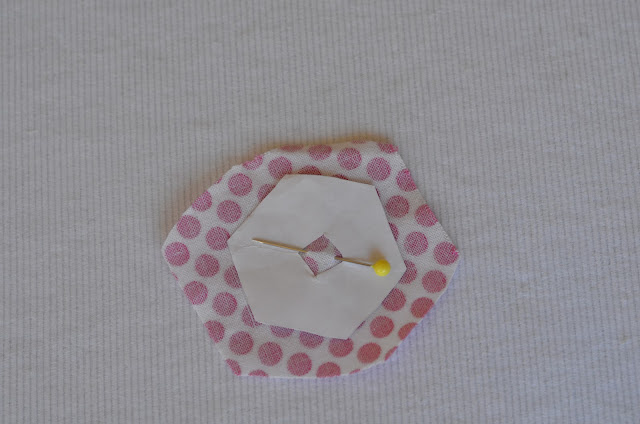
3. Cut a fabric that is in the rough shape of a hexagon, a circle or a square that is approximately 1cm larger than the paper hexagon all around as seen in the picture below.
4. Place your paper on the wrong side (ie. the side that will stay under) of the fabric and place a pin in the middle (where the hole on the paper is). This step you may choose to skip but helps with stabilising the fabric when hand-stitching the corners.
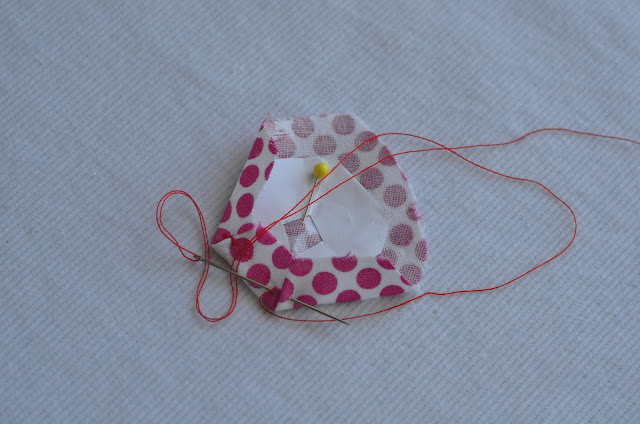
5. Fold one side of the material down along the hexagon edge as seen in the picture below.
6. Now, fold the side next to it as well and make a sharp corner. Using your threaded needle, start stitching the corner. Repeat a few times and then make a knot. The idea is to attach the two sides that make a corner together.
7. Once you secure your first corner with 3-4 stitches and a knot, move on to the next corner with a basting stitch.
8. Continue with the other corners. Secure each corner until there is no loose side.
9. Make a few knots to finish it off at the end and cut your thread about half an inch/a centimeter away from where the last knot is. (To hide the thread, you can run a basting stitch half a centimeter or a centimeter away from the knot and then cut the thread)
10. Take the pin out.
11. Congratulations! Your first hexagon is complete!
12. Now, lets move on to connecting your multiple hexagons. Make many other hexes and decide how you want to arrange them. Depending on the arrangements, you will need to connect your hexagons.
13. To attach your little hexagons together, take two of them and hold them facing the right sides (right side refers to the side that has a print and will stay on top) together. Then, start stitching them together preferably with a coordinating thread. There are a few stitch types that can be used but I like the ladder stitch which gives it a neat look and is hidden. I also find this invisible type of stitch easy to work with too. The next two pictures explain how the ladder stitch works, however, if you need a bit more help, it is like this: you take your first stitch just under either one of the folds and travel it about quarter of an inch under the fold and then come out (in the picture below, I started with the pink polka dots fabric) and then across from where the first stitch came out on the other fabric, take another stitch, again just under the fold. You need to repeat this until the end)
14. At the end, secure your stitches with a few knots. I like to wrap my thread twice around my needle and pull it tight to make a knot and I do that a few times. The thread that I used in this tutorial is high quality and strength (that is why I didn't have the urge to double thread my needle). If your thread is not of the best quality, I would suggest you make sure to make a knot a few times before cutting your thread off or before moving on to stitching the other side of your hexagon.
15. This is how they look when attached.
16. If you are going to make a flower with your hexes, then it is the time you need to take your third hexagon and connect it with the other two that you have just attached. In the picture below, my third hexagon is planned to be the centre of the flower and is yellow. Now, it needs to be attached to both the polka dots and the green fabrics.
17. I first stitched the pink polka dots fabric and the yellow hexagon together.
18. Then, I attached the other side of the yellow hexagon, which was facing the green hexagon, to the green hexagon. While doing that, I needed to bend the pink hexagon a bit, which is totally fine.
19. You need to repeat these last steps with the rest of the missing pieces of your project to complete your fabulous hexagon flower.
20. Once your project is complete, you can easily slip off the paper pieces from the fabric hexagons and you are done!


19 comments:
Great tutorial I love the bib too. I have never done the hexagons but I really want to try. Pinning this
Trust me Mel, you CAN do it! When you give it a go, if you have any questions, let me know and I will try to help you. I am sure you will be fine. Thanks for pinning it by the way :-)
Thank you for the lovely tutorial.So neat and Clean..
I live in Tanzania..will try the Bib i have a small baby who could use it. Im gonna share your tutorial with my sisters..Happy Easter!
Thank you for the lovely tutorial.So neat and Clean..
I live in Tanzania..will try the Bib i have a small baby who could use it. Im gonna share your tutorial with my sisters..Happy Easter!
Thank you Unknown for your feedback. It is always great to hear from the readers. I am glad that you have found the tutorial helpful and I am glad to hear also that you are spreading it around. Enjoy!
Ale fajny sposób na kwietka :) Pozdrawiam
Muito obrigada por essa aula maravilhosa...
hugs
Maria Filomena,
Portugal
My pleasure Malgosia. I am glad you have enjoyed it!
You're welcome Filomena Crochet. I am happy to hear my tutorial has been helpful. Enjoy!
I have never tried hexes - I have seen MANY tutorials, but yours is the only one who is actually going to make me want to try it! So clear, concise and uncomplicated! Thanks so much - I hear making them can be addicting, so I might have you to thank for that :) !!!!!
You have put a huge smile on my face mik41. I am so glad to hear that my tutorial has been very inspirational and motivating for you. It is not only beautiful and useful but is also such a great 'scrap buster' too. Let us know how you go when you start making them. ...and yes, they really are addictive! (I should have put a warning there :-) )
Wonderful tutorial! So clear! And I, also, loved the outcome!
Great post!! I included it in my post Βόλτα στη Γειτονιά!!! ...while sewing!! :)
Have a great weekend!!
Great to hear that you have found the tutorial clear and helpful Tina Pippo. You are most welcome to share the link.
Thank you Cindy Dy, my pleasure.
Çok güzel ;)
Tesekkur ederim X madame :-)
Thank you for your feedback Leslie Lim, lovely to hear. I have customised the blog myself. There are lots of tutorials on the internet on how to customise a blogger/blogspot design/layout. They were quite helpful.
hello! thanks.
- 2.5 inch hexagonsthe link is not working:(
Post a Comment
I love comments. Thank you for leaving one!