.jpg) |
| Photo Source |
Saturday, 30 March 2013
Saturday, 23 March 2013
DID YOU KNOW ...? (63)
 |
| Photo Source |
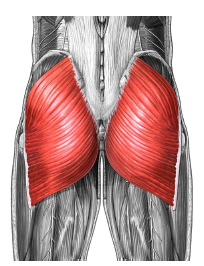
The buttock muscle is the largest muscle in the human body. It is called 'Gluteus Maximus'.
Tuesday, 19 March 2013
RECIPE: Zucchini Pancakes
Recently, our garden has been very generous. We have had a great success particularly with our tomatoes and zucchini (courgette). The tomatoes have been much easier to consume than the zucchinis though as the zucchinis are in large sizes and the weather has been hot recently, which has made it hard to make or eat cooked meals. However, I have recently discovered a new recipe with zucchini that became a family favourite even in this heat.
A few weeks ago, a friend of mine and I met up for a picnic at one of the beautiful gardens of Melbourne city. She had her gorgeous daughter, who is 4 years old with her and I had my two children, aged almost 2 and 4. That is where and when we were introduced to the 'zucchini pancakes/frittas' as it was something that my friend had brought and Mr. Junior (Miss Junior was too busy eating blueberries and dancing to no-music around the park!) enjoyed it and even asked for a recipe. (Remember my son who can bake homemade breads? See, I wasn't joking then. As I have mentioned it there too, he has shown a lot of interest in the kitchen duties and cooking in the recent months and if he enjoys a certain type of food, he asks for a recipe too!)
A few days ago, we had another huge zucchini in the garden that we wanted to utilise and my friend's recipe (with a little bit of a change from the original recipe) came in very handy. We used our big fat zucchini from the garden in ours but the recipe below is for the usual medium sized zucchinis that you can buy at most greengrocers.
Ingredients:
1 zucchini
2 eggs
Dill (finely chopped)
Salt
Pepper
Herbs (we used oregano) (optional)
Flour (the amount depends on the consistency of your mixture. It is added until a 'pancake-like' consistency is formed)
Oil (for shallow frying)
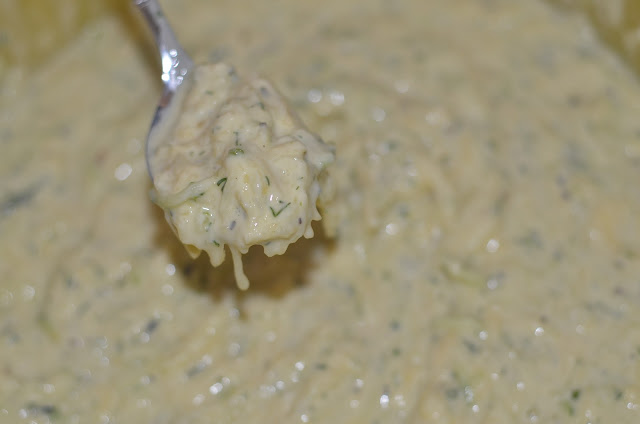
Shred your zucchini. Add all your ingredients except for flour and mix well. Add flour and stir until it forms a semi-runny dough similar to a pancake mix.
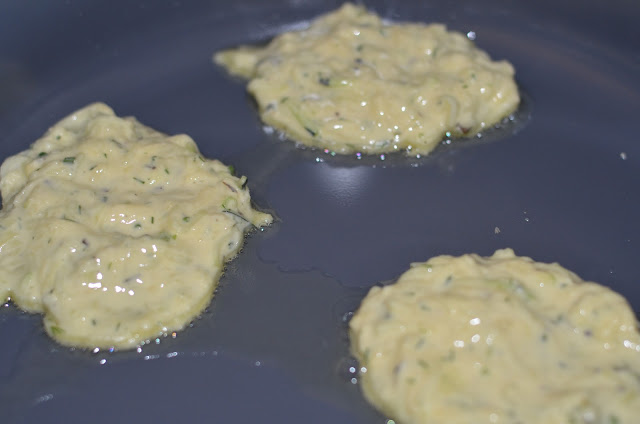
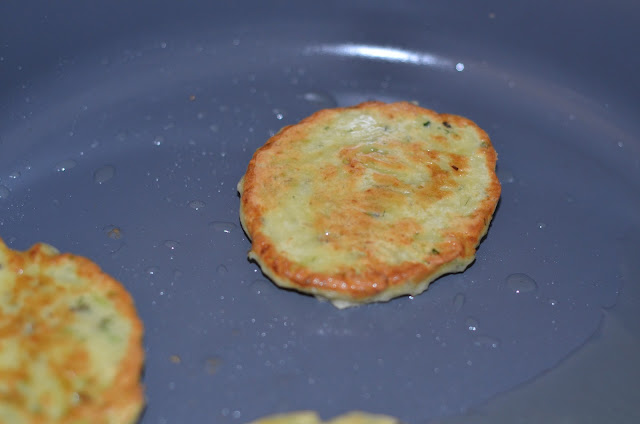
Put some oil in a pan for shallow frying and heat until hot. Using a spoon, take some of your mixture and put it in the pan. Fry in medium or high heat (I used medium heat most of the time). Cook each side and you are done!
This food can be served both hot and/or cold. Some crispy and juicy lettuce compliments it well.
Enjoy something healthy today!
A few weeks ago, a friend of mine and I met up for a picnic at one of the beautiful gardens of Melbourne city. She had her gorgeous daughter, who is 4 years old with her and I had my two children, aged almost 2 and 4. That is where and when we were introduced to the 'zucchini pancakes/frittas' as it was something that my friend had brought and Mr. Junior (Miss Junior was too busy eating blueberries and dancing to no-music around the park!) enjoyed it and even asked for a recipe. (Remember my son who can bake homemade breads? See, I wasn't joking then. As I have mentioned it there too, he has shown a lot of interest in the kitchen duties and cooking in the recent months and if he enjoys a certain type of food, he asks for a recipe too!)
A few days ago, we had another huge zucchini in the garden that we wanted to utilise and my friend's recipe (with a little bit of a change from the original recipe) came in very handy. We used our big fat zucchini from the garden in ours but the recipe below is for the usual medium sized zucchinis that you can buy at most greengrocers.
Ingredients:
1 zucchini
2 eggs
Dill (finely chopped)
Salt
Pepper
Herbs (we used oregano) (optional)
Flour (the amount depends on the consistency of your mixture. It is added until a 'pancake-like' consistency is formed)
Oil (for shallow frying)
Shred your zucchini. Add all your ingredients except for flour and mix well. Add flour and stir until it forms a semi-runny dough similar to a pancake mix.
Put some oil in a pan for shallow frying and heat until hot. Using a spoon, take some of your mixture and put it in the pan. Fry in medium or high heat (I used medium heat most of the time). Cook each side and you are done!
This food can be served both hot and/or cold. Some crispy and juicy lettuce compliments it well.
Wednesday, 13 March 2013
PURSLANE
Purslane is very high in Omega 3. In fact, no other green leafy vegetable contains as high Omega 3 fatty acids as purslane does. It is good for lowering blood pressure and high cholesterol levels. It is very low in calories but a rich source of nutrients such as calcium, magnesium, potassium and copper. It is because of these minerals that purslane is related to bone health, and it may be an excellent food to include in your diet to help maintain strong bones. It also contains some vitamins (mainly vitamin A, vitamin C, and some vitamin B andcarotenoids).
Purslane can be consumed raw or cooked (Watch this space for some easy and tasty purslane recipes). The stems, leaves, flower buds and even the seeds are all edible. However, consumption of high amounts of stems, just like high amounts of spinach, may cause some health issues such as kidney stones due to the high levels of oxalate in them.
An interesting fact: At night, purslane leaves trap carbon dioxide, which is converted into malic acid (the souring principle of apples), and, in the day, the malic acid is converted into glucose. When harvested in the early morning, the leaves have ten times the malic acid content as when harvested in the late afternoon, and thus have a significantly more tangy taste.
 |
| Photo by Tulin Ertuncay |
Monday, 11 March 2013
Sunday, 10 March 2013
DID YOU KNOW ...? (62)
 |
| Photo Source |
Wednesday, 6 March 2013
TUTORIAL: How to Make Fabric Hexagons
I have recently made some items using some fabric hexagons and have had quite a bit of interest and great comments on them. I thought it would be nice to share a free tutorial on making fabric hexagons and how to connect them with you here as well. Here is my easy-to-follow tutorial for you!
Materials Needed:
Some fabric scraps
Some thread
A hand-stitching needle
Some pins
A pair of scissors
A piece of paper with hexagon shapes on it (You can generally re-use these hexagon pieces. Especially some shopping catalogue pages cut into hexagon shapes work really well for this project)
* I have come up with some printable hexagon templates in five different sizes for you. Choose the size that you would like to work with and print it out. (I used 2.5 inch hexagons for this tutorial):
1. Cut out your hexagon shapes.
2. Cut a little hole in the middle of your hexagon shaped paper. To do that, you can just fold your hexagon in half and cut a triangular shape in the centre (when you open it, it becomes a little diamond shaped hole).
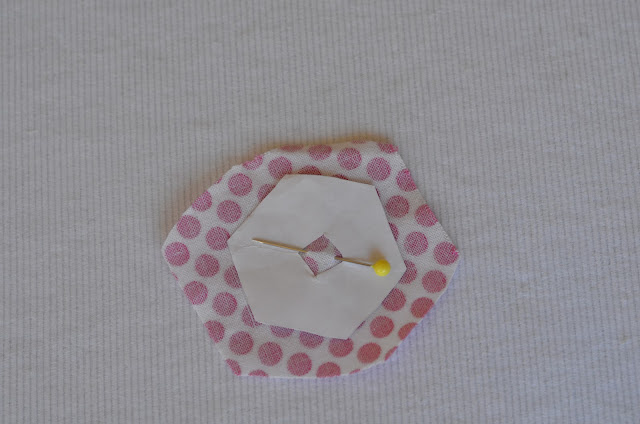
3. Cut a fabric that is in the rough shape of a hexagon, a circle or a square that is approximately 1cm larger than the paper hexagon all around as seen in the picture below.
4. Place your paper on the wrong side (ie. the side that will stay under) of the fabric and place a pin in the middle (where the hole on the paper is). This step you may choose to skip but helps with stabilising the fabric when hand-stitching the corners.
5. Fold one side of the material down along the hexagon edge as seen in the picture below.
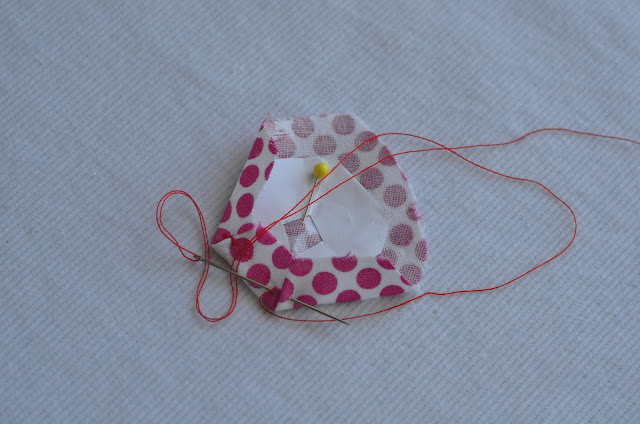
6. Now, fold the side next to it as well and make a sharp corner. Using your threaded needle, start stitching the corner. Repeat a few times and then make a knot. The idea is to attach the two sides that make a corner together.
7. Once you secure your first corner with 3-4 stitches and a knot, move on to the next corner with a basting stitch.
8. Continue with the other corners. Secure each corner until there is no loose side.
9. Make a few knots to finish it off at the end and cut your thread about half an inch/a centimeter away from where the last knot is. (To hide the thread, you can run a basting stitch half a centimeter or a centimeter away from the knot and then cut the thread)
10. Take the pin out.
11. Congratulations! Your first hexagon is complete!
12. Now, lets move on to connecting your multiple hexagons. Make many other hexes and decide how you want to arrange them. Depending on the arrangements, you will need to connect your hexagons.
13. To attach your little hexagons together, take two of them and hold them facing the right sides (right side refers to the side that has a print and will stay on top) together. Then, start stitching them together preferably with a coordinating thread. There are a few stitch types that can be used but I like the ladder stitch which gives it a neat look and is hidden. I also find this invisible type of stitch easy to work with too. The next two pictures explain how the ladder stitch works, however, if you need a bit more help, it is like this: you take your first stitch just under either one of the folds and travel it about quarter of an inch under the fold and then come out (in the picture below, I started with the pink polka dots fabric) and then across from where the first stitch came out on the other fabric, take another stitch, again just under the fold. You need to repeat this until the end)
14. At the end, secure your stitches with a few knots. I like to wrap my thread twice around my needle and pull it tight to make a knot and I do that a few times. The thread that I used in this tutorial is high quality and strength (that is why I didn't have the urge to double thread my needle). If your thread is not of the best quality, I would suggest you make sure to make a knot a few times before cutting your thread off or before moving on to stitching the other side of your hexagon.
15. This is how they look when attached.
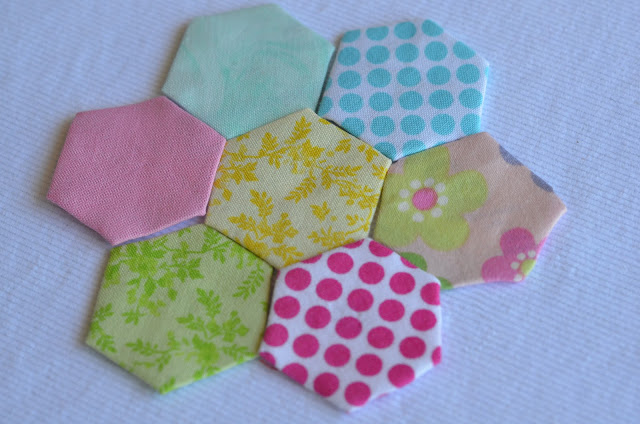
16. If you are going to make a flower with your hexes, then it is the time you need to take your third hexagon and connect it with the other two that you have just attached. In the picture below, my third hexagon is planned to be the centre of the flower and is yellow. Now, it needs to be attached to both the polka dots and the green fabrics.
17. I first stitched the pink polka dots fabric and the yellow hexagon together.
18. Then, I attached the other side of the yellow hexagon, which was facing the green hexagon, to the green hexagon. While doing that, I needed to bend the pink hexagon a bit, which is totally fine.
19. You need to repeat these last steps with the rest of the missing pieces of your project to complete your fabulous hexagon flower.
20. Once your project is complete, you can easily slip off the paper pieces from the fabric hexagons and you are done!
Saturday, 2 March 2013
DID YOU KNOW ...? (61)
Snakes are carnivores. They only eat flesh (other animals and bugs). They do not eat any fruit or vegetables.
Subscribe to:
Comments (Atom)


