***
I’m a mum to 3 beautiful kids, and I love to create – to sew, paint, draw, stitch, garden; the list goes on... I have always loved handmade products. I think that there's something really special about an item that's had lots of thought, time and effort put into it, and that has been made with love. After my kids were born, I felt that I needed a creative outlet from home, and so I started up Little Denim Duck – handmade kids clothing, decor, accessories and much more! www.facebook.com/littledenimduck
I love what I do, and I love sharing my experiences too. That’s how we learn. I’ve been very lucky to have met some amazing people who have taught me so much, and have helped me in so many ways.

I love what I do, and I love sharing my experiences too. That’s how we learn. I’ve been very lucky to have met some amazing people who have taught me so much, and have helped me in so many ways.
I would like to share with you an inexpensive, easy and very effective way to organise your fabric stash. I hope you love it as much as I do! - Jama

Does your fabric stash look a bit like this?
That’s where they stayed too. Until one day I discovered how to use corflute to make my own fabric bolts with... And now it looks like this!!
Here’s how I did it:
Corflute (or flute board) is the corrugated plastic sheeting that you see signs on the side of the road made of. You can buy it from hardware stores, or even try your local politician or bottle shop... they often use it for signage and it just gets thrown out afterwards, so they’re usually happy to offload it for free
I cut my corflute into approximately 12 inch x 8 inch pieces. I found this to be the best size for my cube shelving, but you may have to experiment to find the best size for your space...
This size was the perfect size for my fabrics of which I had a minimum of 1 yard... the smaller mini-bolts that you can see in my photo were approximately half this size, and fit my ½ yard fabrics well.
Once you have your corflute cut to size, you’re ready to begin!
Step 1: Iron your fabric. This is not an essential step, especially if you have just taken it off the wash-line and it’s relatively flat. But if it has been in a heap on the floor, and is full of creases, you will need to flatten it out to make the most of your space.
Step 3: Fold it in half again the same way. You should have a long, thin sheet of fabric in front of you now. Depending on the size of your corflute, you may need to fiddle with the amount of folds that you need to make it fit, but this way worked best for me.
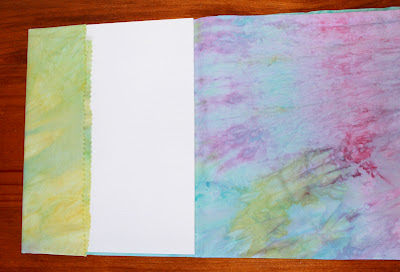
Step 4: Place your piece of corflute a few inches from the end, and fold your fabric over it...
Step 5: Continue to flip your corflute over and over until almost the entire length of fabric is folded onto it.
I like to fold the end over a bit before the last fold – I just think it keeps it neater – but you don’t have to do this
I like to fold the end over a bit before the last fold – I just think it keeps it neater – but you don’t have to do this
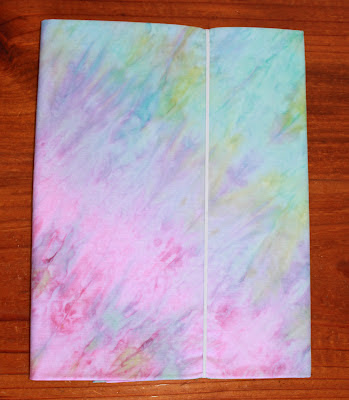
Step 6: Fold the fabric entirely onto the corflute bolt, and secure with some thin elastic. Rubber bands are not suitable for this, as they disintegrate and leave horrible marks on your beautiful fabric. I have heard of people using bobby pins also to secure the ends instead of elastic – it’s up to you what you use!
Final Step: Slide your new mini-bolt into your shelving, repeat with your other fabrics, and admire your finished product!!
Now, not only can you see all of your fabrics easily, but it looks pretty too!! Enjoy!!


6 comments:
Same here and I must admit, I find it hard to take my eyes off her fabric stash too! What a smart idea and how beautifully presented!
So pretty! My fabric stash is hidden away in ugly plastic drawers. Some day I would love to have it all on display like this! :)
I don't think you are alone Clare :-) I am totally in love with the way Jama's fabric stash is displayed. Lets see when you get to do it too!
This is the best idea ever! I don't know why I didn't think of it - I have cubby shelves just like this in my sewing room, but my fabric is just stacked in it and it can make it hard to get it out when I want something. I know that a local recycling shop has corflute, I am going to go and pick some up as soon as I am able!
Thank you Heather. They make the fabrics sit up nicely and they look divine on shelves. It can be a bit time consuming initially but I believe it is well worth it. Good luck!
You have discussed an interesting topic that everybody should know. Very well explained with examples. I have found a similar website
corflute signs visit the site to know more about sinking.
Post a Comment
I love comments. Thank you for leaving one!