
Monday, 15 October 2012
CLEANING STAINLESS STEEL APPLIANCES
If you have stainless steel kitchen products such as pots, then put some
white vinegar in a bottle with a sprayer head spray it to the surface
you need to clean. Use a piece of clean cloth to wipe it with.

Saturday, 13 October 2012
DID YOU KNOW... ? (41)
The best food for a newborn is called COLOSTRUM. It is the thick, yellowish liquid/milk that the mother produces in the very first few days of giving birth. It is extremely beneficial for babies!
Friday, 12 October 2012
Blast from the Past Competition Results
Before I happily announce the top 3 winners of the last
giveaway, I would like to say
that it was truly a pleasure to read through all those games that each
entrant has listed. I hope our children and the generations after them
can think of at least as many games when they dig into their childhood
memories as well when they are adults. Thank you all for your time and
effort.
The winners are as follows (respectively):
1. Shiitake
2. Katherine
3. Jess
I will need Shiitake to choose her 3 prizes from the list in the next few days and let me know by Wednesday the 17th of October. Once I receive the e-mail/message and I know what she has chosen, I will contact Katherine and let her know what other prizes are available for her to choose from. She will be choosing 1 prize from the remaining. After she does it in a few days again, I will contact Jess to let her know of her prize. The sponsors will also be informed of who has taken what.
Just a reminder also that all Melbournian entrants will be eligible for a 20% discount from Organic Origins as mentioned in the giveaway post on the blog as well. To be able to claim it, please contact me by Wednesday the 31st of October, 2012 and I will be providing you with the relevant information for you to have a valid claim.
The prizes are proudly sponsored by:
Printcraft Wall Decals
MeeMee's Little Munchkins
Emma Loves to Sew!
OrganiKare
Organic Origins
NOTE: Anyone (existing entrants and others) is most welcome to feel free to add to the list more games anytime you get a chance to just so that we can have a good collection of many-forgotten-games that we may be able to pass on to our children with some conscious effort. To do so, just click here, scroll down until you see the 'comments' option and add your list in the comments section.
The winners are as follows (respectively):
1. Shiitake
2. Katherine
3. Jess
I will need Shiitake to choose her 3 prizes from the list in the next few days and let me know by Wednesday the 17th of October. Once I receive the e-mail/message and I know what she has chosen, I will contact Katherine and let her know what other prizes are available for her to choose from. She will be choosing 1 prize from the remaining. After she does it in a few days again, I will contact Jess to let her know of her prize. The sponsors will also be informed of who has taken what.
Just a reminder also that all Melbournian entrants will be eligible for a 20% discount from Organic Origins as mentioned in the giveaway post on the blog as well. To be able to claim it, please contact me by Wednesday the 31st of October, 2012 and I will be providing you with the relevant information for you to have a valid claim.
The prizes are proudly sponsored by:
Printcraft Wall Decals
MeeMee's Little Munchkins
Emma Loves to Sew!
OrganiKare
Organic Origins
NOTE: Anyone (existing entrants and others) is most welcome to feel free to add to the list more games anytime you get a chance to just so that we can have a good collection of many-forgotten-games that we may be able to pass on to our children with some conscious effort. To do so, just click here, scroll down until you see the 'comments' option and add your list in the comments section.
Thursday, 11 October 2012
FROM MAMA TO BUBBA (1): A Handmade Dress
The pictures below are my proof that once you set your mind to something, you are very likely to achieve it! It was a day when I had so much time in hand that I didn't know what to do with and I am not a person who is extremely good at handling 'nothing-to-do' times. I had the urge to challenge myself with something and I took the plunge to destroy a never-worn shirt of my niece who has generously donated it to me for me to 'make something with'.
I took out one of my daughter's much loved dresses and decided to make something similar to that. I had almost no idea how to make a dress but I had the courage to give it a go anyway. At the time, my daughter was possibly either not born yet, or a newborn as I remember the burgundy dress was never worn before.
Using the dress that I had bought for Miss Junior possibly even before she was born and some scrap paper that I found around the house, I came up with an amateur pattern. Basically, I laid the dress on top of a large piece of paper and with the help of a pen, I drew around it after deciding what parts of the shirt I wanted to use for the dress. I allowed approximately 1/2cm-1cm for seam (and correction if needed). In other words, I cut my fabric about a centimeter away from where the actual dress's lines were. While cutting the dress, I made sure that I worked with the buttons and the buttonholes that the original shirt had rather than working against them. I used them as an advantage to me as I didn't really know how to make my own. I used the same strategy with the hems on the skirt of the dress and the sides whenever possible.

I used some light blue binding tape that I happened to have a small amount of at home around the arm holes and just folded the neck line and sewed. I placed a soft velvety ribbon on top of the folded area on the neck for a better look and comfort. I think it worked pretty well considering the only sewing I did was the binding on the armholes and the folded area around the neck.

With this particular project, the success was through some good planning and the
amount of love I put in it knowing (or rather hoping) that one day, my
little princess would wear it!

I tried this dress on the latest addition
of our family just a few days ago and was thrilled to see that it sat
beautifully on her. Definitely looking forward to making some good use
of it sometime soon!

Saturday, 6 October 2012
DID YOU KNOW ...? (40)
It is believed that in 1780, William Addis developed the first mass produced toothbrush. At the time, the handle was made using a cow bone and it had cow tail-hair bristles. Toothbrushes had a deluxe option which was the one with hog hair until 1938 when the use of nylon took over.
Wednesday, 3 October 2012
GUEST BLOG ENTRY: Felt Owl Tutorial
Today's entry comes from Sedef Imer, who is about to have her second child any minute. After sending her many thanks for her great work and very valuable contribution, and wishing her the best of luck with the birth of her daughter and motherhood in general, I am leaving you with her post. Enjoy!
I got into felt work about 6 months ago after a friend showed me the activity books she had made for her kids 20 years ago. I just had to make one for my boy, as you simply cannot purchase those at the shops! I am completely self taught, thank god for google and you tube tutorials... Currently half way through making a felt activity book for my toddler (who is now 19 months old). About 2 months ago I bought my first sewing machine and started learning how to use it, so I am diversifying from felt. So far, I have tried my hand at relatively easy stuff, mainly making decorations for the new baby's nursery - bunting, cushion cover, rag doll etc. Next, I have a simple quilt planned for my little girl.
This tutorial covers how to make an ornamental felt hanging to decorate your baby's nursery or a child's room. It also demonstrates basic principles of felt sewing which can easily be replicated for other animals or other types of decorations.
Step 1 - Find an image that you wish to turn into a decoration. If doing this for commercial purposes always check with the owner of the image if they give you permission to use it! This is a felt owl image I found on google, nice simple lines. It doesn't have to be the picture of a felt object, any simple vector or clipart would also work. You can also draw your own (sadly I am not talented enough in this department, so I resort to technology) ;)
 Step 2 - Gather and prepare your materials and tools:
- Felt for the body, belly, and wings (whatever colours you want), white felt for eyes, orange felt for feet and beak (and black felt if you can't find a black button the right size for the eyes)
- Scissors
- Craft glue or hot glue gun
- Pins or stapler
Step 5 - Roughly cut the patterns out (not on the line, but slightly out)
 Step 6 - Pin or staple the patterns onto felt. I prefer staples (just an ordinary stapler) as they lay flat on the felt and produce a better more precise finish on the cut piece. But normal sewing pins will do too.
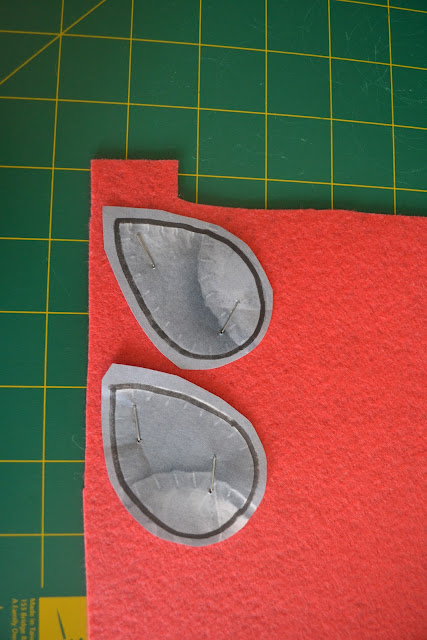
Step 7 - Cut on the black line. Tip: For cutting out smaller pieces like feet and also pieces with curves like the eyes - i find it easier to use a pair of curved nail scissors for those.


All pieces are now cut and ready to stitch/assemble.
Step 8 - Get your matching embroidery thread. I used three colours - pink to match the body, strawberry to match the wings, and black for the eyes. All my thread is in an organiser box but the white skein is how they come.
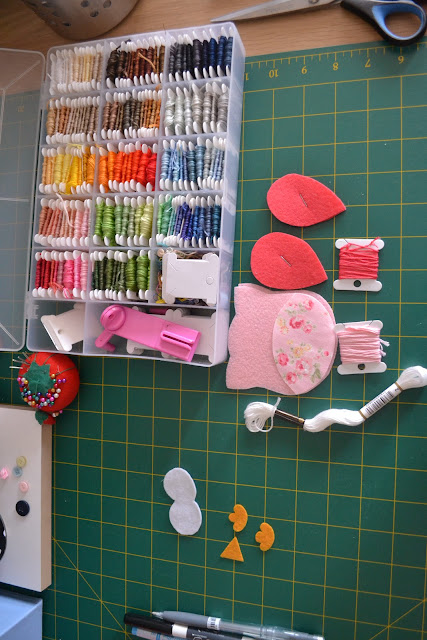
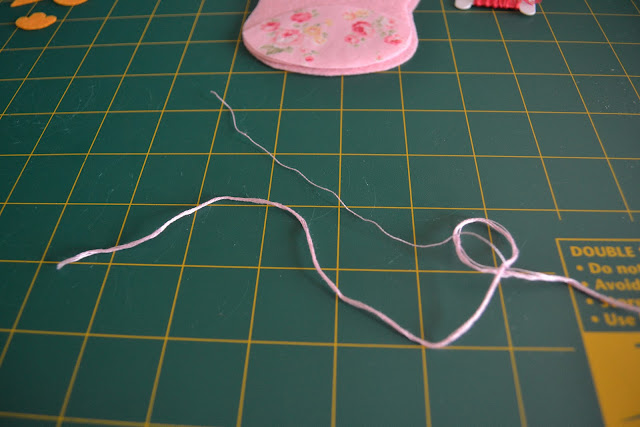
Step 9 - Warning - only use 1 strand from the embroidery thread, not all 6! Some people prefer to use 2 strands to make the stitches stand out, you can even use a contrasting colour (lighter/darker) of thread to make them stand out more. I prefer mine to blend in as much as possible so I use one strand of matching colour. If you are making a larger ornament, you may want to use more strands.
Step 10 - We now need to prepare each 'side' of the owl before stitching them together. Starting with the front. I decided to use fabric for the belly so stitched it on to the felt using backstitch (google it if you dont know how to do backstitch, it's very easy). If you are using felt you can just glue the piece on, no stitching required. You can also glue fabric on if it is a darker colour fabric, but the glue may show under a lighter colour fabric.

Step 11 - Glue the eyes, beak and feet on. I also stitched a little fabric rose that i already had to make it extra girly ;) I just use craft glue, any liquid glue or hot glue gun will be fine.

Step 12 - Eyes. Sew on the black button. If you are making a winky eye, you can either draw it on with a felt tip pen, or for a more professional look embroider it on. I first drew on the winky eye using a water erasable pen (you can just use a pencil or pen even, as the stitches will cover the pen mark)

Step 14 - The back. Staple or pin the wings where you want them. WARNING - make sure you staple them on to the correct side of the felt, as the pattern is unlikely to be symmetrical!

Step 15 - Blanket stitching the wings onto the body. Before you attempt this cut two small pieces of felt and learn to blanket stitch. This is a good tutorial. http://www.futuregirl.com/craf

Step 16 - as you stitch around the wings, you will eventually get to the body. Just keep stitching it as if the body isn't there, putting the needle down through it and back up where you want it to come. The wings are now stitched on.


Step 17 - Sew 3 decorative buttons on to the back which i think is a nice touch. Both front and back now finished and ready to stitch together!

Step 18 - Blanket stitching the front and back. When you get to the wings, make sure you dont sew through them as the stitches will show on the wings! Just push the wings back a bit with your hand and pretend they are not there.

Step 19 - Blanket stitched all the way around except a 3cm opening at the top (for the stuffing). I just left the thread and needle hanging to finish the stitching after filling.

Step 20 - Get your filler material. This is the one i use, they come in $3 bags from spotlight. Excuse my toddler's toy car in the background! :)
Step 21 - Stuff it in using a pencil and your finger, push into all the nooks and crevices. I found the ears were easier with my fingers.

Step 22 - Put a ribbon through the opening on top before finishing the blanket stitch.
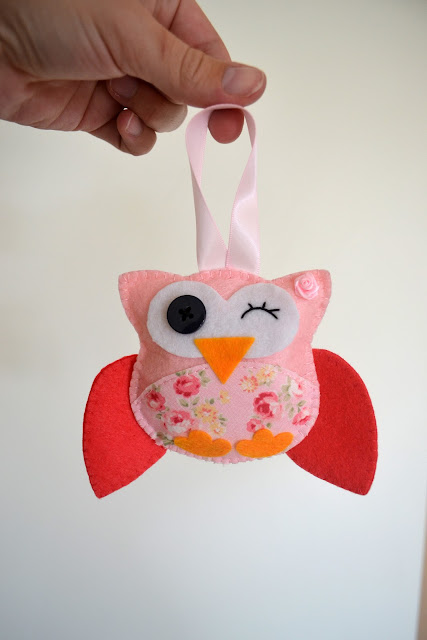
 Voila! A cute little owl to decorate your kid's room :)

Note: Soon after Sedef wrote this post for us here and had her second child, her beautiful daughter, she launched her own business page, shop and blog. Great work Sedef!
***
I am an ex-investment banker-management consultant-chartered accountant (basically high flying career girl lol) originally from London but had a complete lifestyle change when my husband and I moved to Adelaide in 2009 and then had our first baby. I am now a proud stay-at-home-mum and also pregnant again and due to have a little girl in October. I have discovered and fallen in love with crafts and sewing recently, a total lifestyle transformation.I got into felt work about 6 months ago after a friend showed me the activity books she had made for her kids 20 years ago. I just had to make one for my boy, as you simply cannot purchase those at the shops! I am completely self taught, thank god for google and you tube tutorials... Currently half way through making a felt activity book for my toddler (who is now 19 months old). About 2 months ago I bought my first sewing machine and started learning how to use it, so I am diversifying from felt. So far, I have tried my hand at relatively easy stuff, mainly making decorations for the new baby's nursery - bunting, cushion cover, rag doll etc. Next, I have a simple quilt planned for my little girl.
This tutorial covers how to make an ornamental felt hanging to decorate your baby's nursery or a child's room. It also demonstrates basic principles of felt sewing which can easily be replicated for other animals or other types of decorations.
Step 1 - Find an image that you wish to turn into a decoration. If doing this for commercial purposes always check with the owner of the image if they give you permission to use it! This is a felt owl image I found on google, nice simple lines. It doesn't have to be the picture of a felt object, any simple vector or clipart would also work. You can also draw your own (sadly I am not talented enough in this department, so I resort to technology) ;)

- Felt for the body, belly, and wings (whatever colours you want), white felt for eyes, orange felt for feet and beak (and black felt if you can't find a black button the right size for the eyes)
- Scissors
- Craft glue or hot glue gun
- Pins or stapler
- Embroidery thread in matching colours and sewing needle (embroidery needle if you have one, it has a larger eye than a regular sewing needle)
- Filling material (hobby fill or pillow filler, even cotton wool will do)
- Black button for the eye(s) and 3 buttons to decorate the back
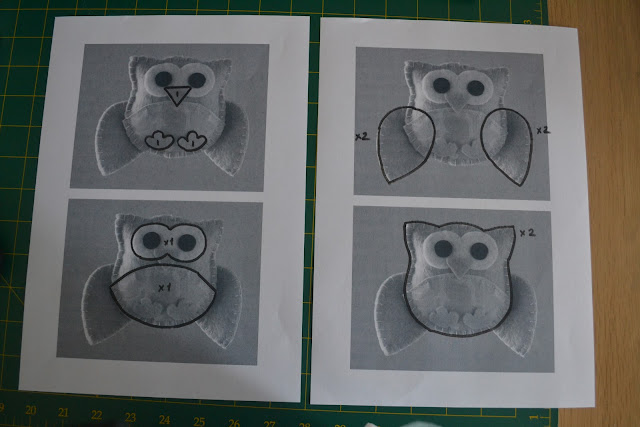
 Step 3 - Using whatever software you prefer enlarge the picture to the size you want your finished product to be. Mine is about 10cm tall. I use Adobe Illustrator for patterns. The page size i use is A4 so I know the exact size the owl will be when printed & templated. You can also use photoshop, even powerpoint. Or get it enlarged with a photocopier :) I put two owls on a page as i will need several of these for the patterns, so to save on paper.

Step 4 - Print enough of the owls so you have a pattern piece for each 'element' of their body, and trace around the various body parts with a felt pen.
- Filling material (hobby fill or pillow filler, even cotton wool will do)
- Black button for the eye(s) and 3 buttons to decorate the back


Step 4 - Print enough of the owls so you have a pattern piece for each 'element' of their body, and trace around the various body parts with a felt pen.

Step 5 - Roughly cut the patterns out (not on the line, but slightly out)


Step 7 - Cut on the black line. Tip: For cutting out smaller pieces like feet and also pieces with curves like the eyes - i find it easier to use a pair of curved nail scissors for those.


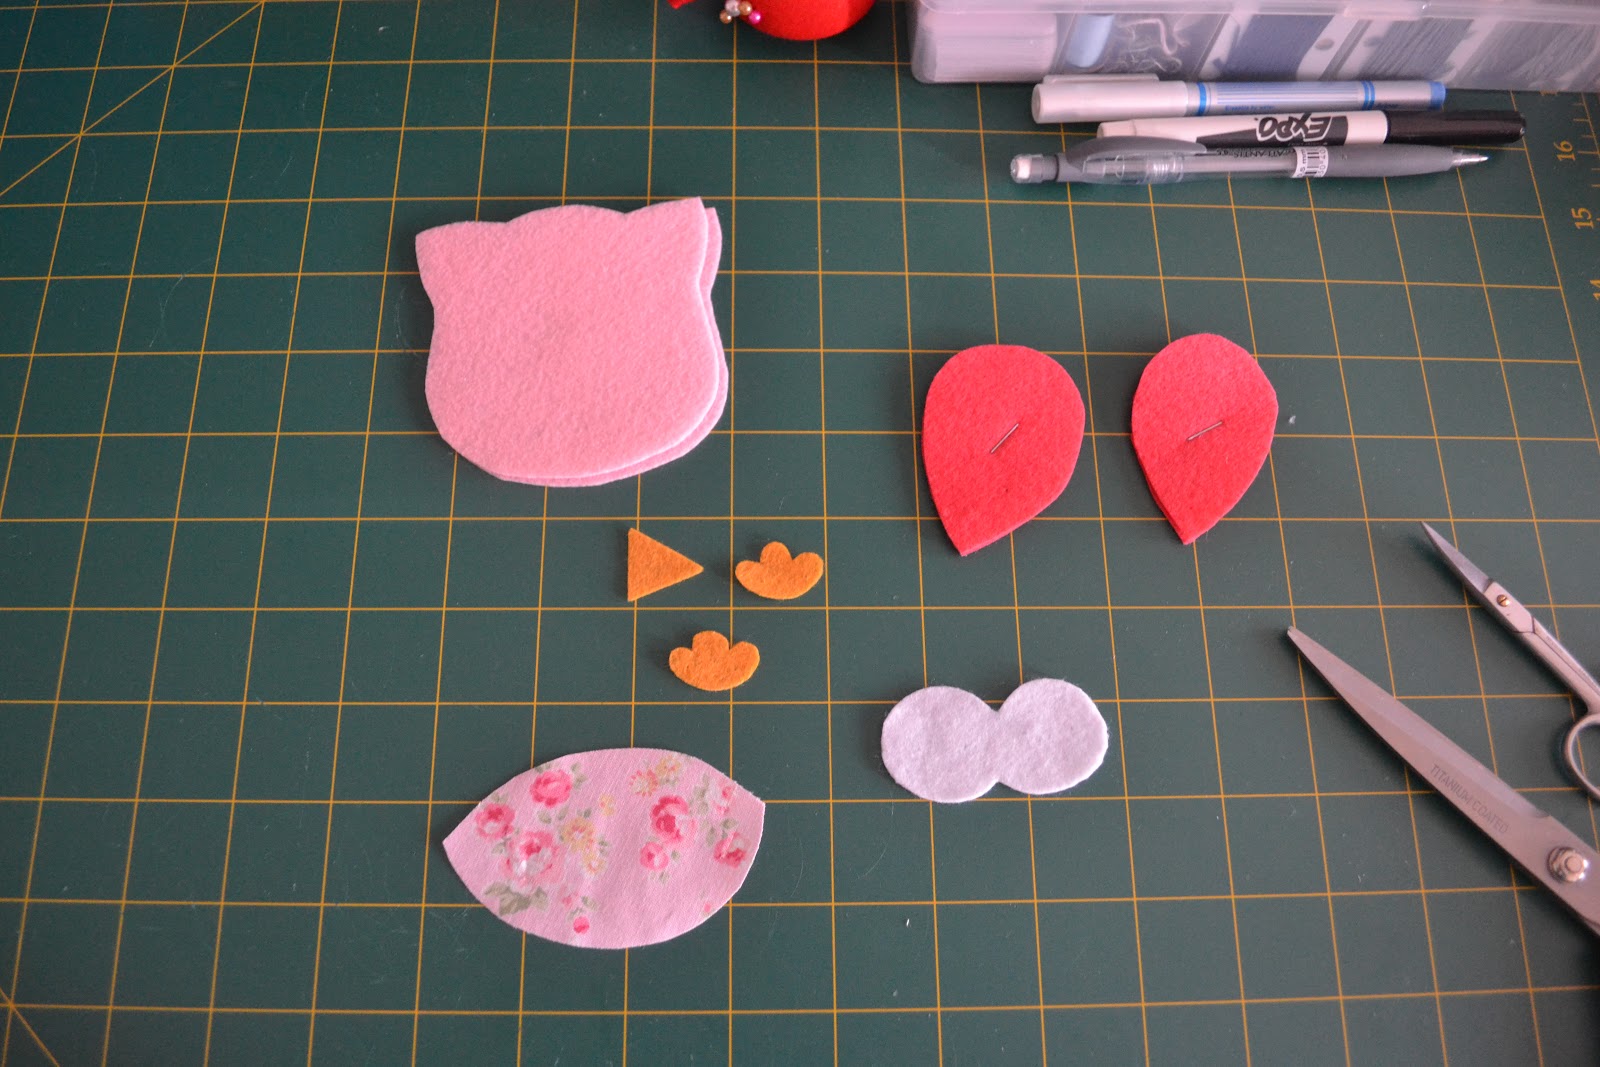
All pieces are now cut and ready to stitch/assemble.
Step 8 - Get your matching embroidery thread. I used three colours - pink to match the body, strawberry to match the wings, and black for the eyes. All my thread is in an organiser box but the white skein is how they come.

Step 9 - Warning - only use 1 strand from the embroidery thread, not all 6! Some people prefer to use 2 strands to make the stitches stand out, you can even use a contrasting colour (lighter/darker) of thread to make them stand out more. I prefer mine to blend in as much as possible so I use one strand of matching colour. If you are making a larger ornament, you may want to use more strands.
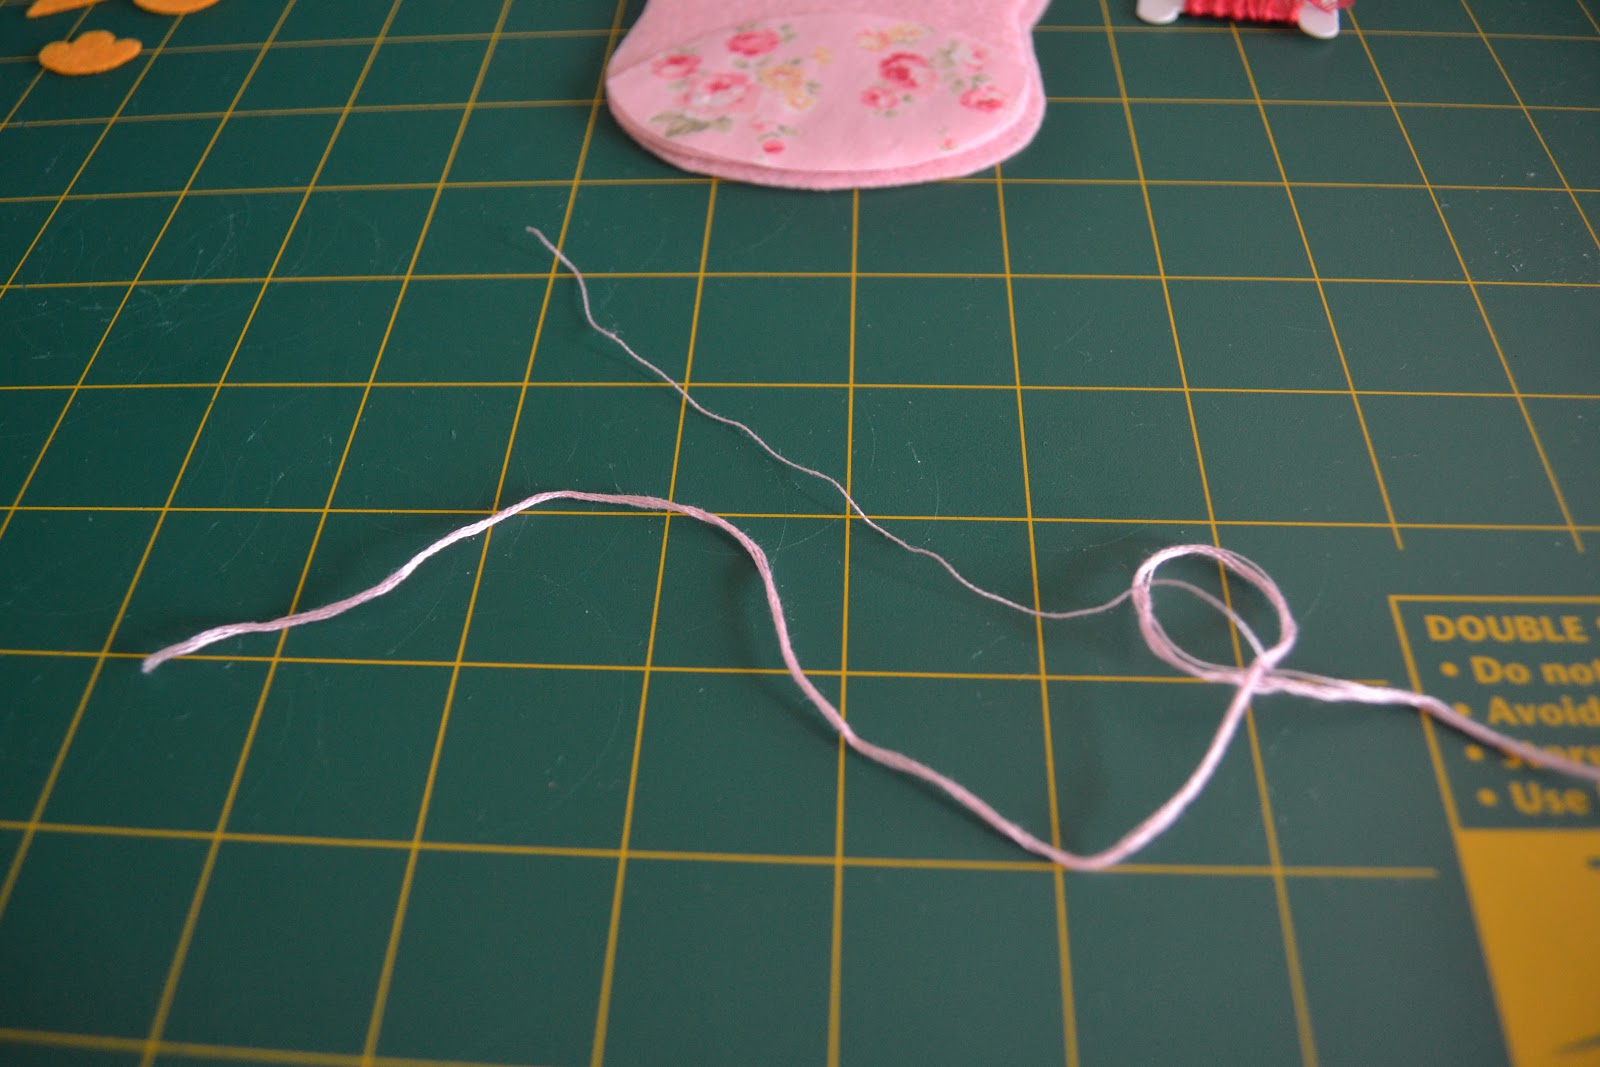
Step 10 - We now need to prepare each 'side' of the owl before stitching them together. Starting with the front. I decided to use fabric for the belly so stitched it on to the felt using backstitch (google it if you dont know how to do backstitch, it's very easy). If you are using felt you can just glue the piece on, no stitching required. You can also glue fabric on if it is a darker colour fabric, but the glue may show under a lighter colour fabric.

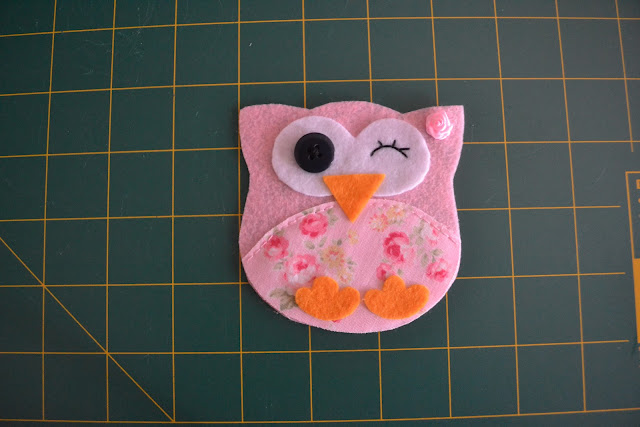
Step 11 - Glue the eyes, beak and feet on. I also stitched a little fabric rose that i already had to make it extra girly ;) I just use craft glue, any liquid glue or hot glue gun will be fine.

Step 12 - Eyes. Sew on the black button. If you are making a winky eye, you can either draw it on with a felt tip pen, or for a more professional look embroider it on. I first drew on the winky eye using a water erasable pen (you can just use a pencil or pen even, as the stitches will cover the pen mark)

Step
13 - Embroider small backstitches following the pen line to make the
winky eye. I used three strands of black thread for this as one strand
would have been too thin. I then dabbed a bit of water on top to get rid
of the blue from my pen. And voila the front is finished.

Step 14 - The back. Staple or pin the wings where you want them. WARNING - make sure you staple them on to the correct side of the felt, as the pattern is unlikely to be symmetrical!

Step 15 - Blanket stitching the wings onto the body. Before you attempt this cut two small pieces of felt and learn to blanket stitch. This is a good tutorial. http://www.futuregirl.com/craf

Step 16 - as you stitch around the wings, you will eventually get to the body. Just keep stitching it as if the body isn't there, putting the needle down through it and back up where you want it to come. The wings are now stitched on.


Step 17 - Sew 3 decorative buttons on to the back which i think is a nice touch. Both front and back now finished and ready to stitch together!

Step 18 - Blanket stitching the front and back. When you get to the wings, make sure you dont sew through them as the stitches will show on the wings! Just push the wings back a bit with your hand and pretend they are not there.

Step 19 - Blanket stitched all the way around except a 3cm opening at the top (for the stuffing). I just left the thread and needle hanging to finish the stitching after filling.

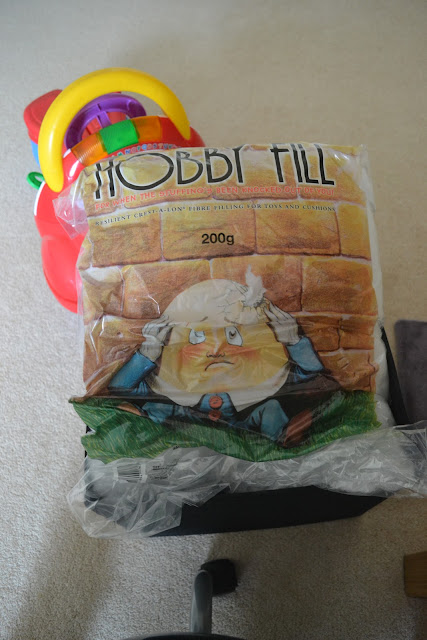
Step 20 - Get your filler material. This is the one i use, they come in $3 bags from spotlight. Excuse my toddler's toy car in the background! :)

Step 21 - Stuff it in using a pencil and your finger, push into all the nooks and crevices. I found the ears were easier with my fingers.

Step 22 - Put a ribbon through the opening on top before finishing the blanket stitch.


Monday, 1 October 2012
Subscribe to:
Posts (Atom)