Friday, 27 July 2012

TUTORIAL: How to Fold a Fitted Sheet

I learnt how to fold a fitted sheet properly from my husband when we first got married. Before then, I had always thought that it was a hassle to get it right and in many cases, my efforts would result not so pleasantly let alone the frustration I would have. In time, I have met many people who made me feel not so lonely on this matter and I thought sharing an easy to follow audiovisual resource on how to fold a fitted sheet easily may make life easier for many. I hope you find the video useful. 

 Have an easy day today!


Thursday, 26 July 2012

FOOD DESIGN (5)

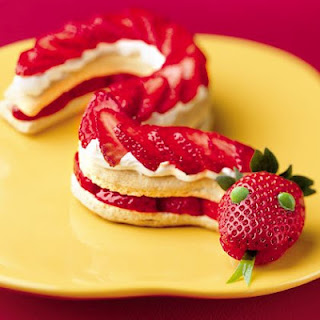
fruit dish

Some people are so smart and skillful, don't you think? I found this somewhere on the internet (can't find the original source) and thought it is something to be shared. In my opinion, this would be a great design for a themed party, especially. Well done to the owner of the idea and the maker of this fun dish!

Tuesday, 24 July 2012

GIVEAWAY TIME (sponsored by MADE BY Y)


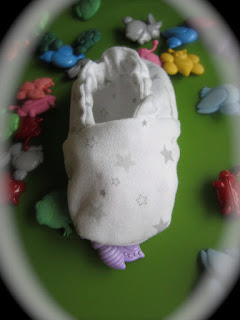
Reversible shoes
Shoe No.1


These gorgeous reversible shoes are all hand-made by MADE BY Y. They will look and feel great on your precious little one's feet and they also make an excellent gift for a special one. They can be yours absolutely for free wherever you are around the globe. Here is how:

1. Like MADE BY Y (facebook page).

2. Become a follower on this blog, homeofhomemadetreasures.blogspot.com.

 3. Leave a comment under this post indicating that you have completed the first two steps. Also, indicate the shoe (eg. Shoe No. 2) and the size you would like so that if you win, you can get that pair (or if you have multiple entries, for each entry, indicate a pair and size that you would like to win).

4. (Optional) Bring in more people if you would like some extra entries (it has to be made clear that they were sent by you). Invite friends and get them join the fun and your name will be in the draw again! Each time a person that enters the competition and mentions your name, you have an entry! (2 people referred = 2 more entries, 5 people referred = 5 more entries etc)

 Notes:

* If you have multiple entries, you may win more than one prize if your name is drawn more than once at the end of the competition.

* Each shoe is made out of 100% cotton fabric.

* These shoes are reversible. Each side is a unique pair of shoes.

* Postage to anywhere in the world will be paid by MADE BY Y .

* All shoes are available for sizes 3months - 2yo.

* The competition ends at 8.00pm (Melbourne, Australia) on Sunday, 5 August 2012. Winners will be announced within the next 24 hours. (random.org will be used).

Good luck!
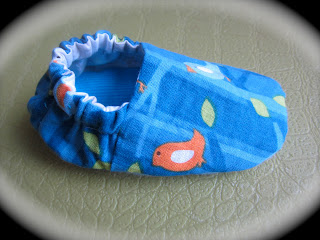
Boys shoes
Shoe No.2
Fabric shoes
Shoe No3
shoes by MADE BY Y
Shoe No.4
Handmade baby shoes
Shoe No.5


Monday, 23 July 2012

VEGETARIAN KOFTAS/POTATO PATTIES


patates koftesi

These are the photos of some vegetarian koftas that were made for us on a visit to a beautiful family less than a month ago. I enjoyed them so much just like everyone else around the breakfast table that I had to take some photos and share the recipe with you all.

Note that the recipe normally includes some chopped parsley as well but on the day, the host family did not have any in hand, so these potato patties were made without parsley (they were still very delicious!).

Ingredients:

Boiled and mashed potatoes (about 4 medium sized)
Some stale/not fresh bread (inside) or some bread crumbs (about a handful)
1 egg
200g grated tasty or mozzarella cheese
Chopped fresh parsley
Salt
Cummin powder (optional)
Black pepper
Some oil (preferably olive oil) for shallow frying

vegetarian patties
Method:

Make a dough using all of the ingredients required except for bread/ bread crumbs. Add the bread/crumbs at the end and make sure it has a nice consistency; not too runny or doughy. Make patties and cook them in high heat. Be sure that the oil is already hot before you start cooking the patties.

Enjoy!


Saturday, 21 July 2012

DID YOU KNOW ... (29)?

Perspiration is odourless. Bacteria on the skin creates the odour.

Friday, 20 July 2012

VINEGAR AS A WINDOW CLEANER


Add 2cups of vinegar into 1lt of warm water and use this mixture in window/glass cleaning.

Thursday, 19 July 2012

GUEST POST: (TUTORIAL) Block Panel Painting

This guest blog post comes from another blogger, Michaela, who is into arts and crafts and works for a coupon company that offers some good deals on art supplies and more.  She blogs here and they are also on pinterest. 

After thanking Michaela for this easy to follow 5 step tutorial, I am leaving you with her entry.

***
block panel painting
(photo by Roger Mommaerts)

I love having colorful decorations in my house; they’re the easiest way to brighten up a room or tie furniture together. I have the hardest time finding art that I like, in the colors I want, and most importantly that I can afford. Most medium to large paintings cost several hundred dollars – especially if they’re one of a kind. That’s when I started looking around for DIY art for your house and I found a lot of great suggestions. Today I’m going to teach you how to make a block panel painting!

Step 1: Buy 9 5X5 canvas blocks and a set of acrylic paint (You can make the blocks bigger or smaller based on the size of the space you want to hang them in).

**They sell them in a few places but I recommend Utretchtart because the blocks are inexpensive and you can buy acrylic paint there too. Also Havedeals has A Utretch Art Supply coupon to save you 40% on paint!

Step 2: Mix - Choose two colors that are close to each other on a color wheel. Mix the colors to create 3 additional shades–a light, a middle, and a dark. (Overall you should have 5 colors: the 2 originals and the 3 mixed colors)

Step 3: Paint - Paint square 1 the lightest (original) color. Paint squares 2 and 4 the lightest mixed color. Paint squares 3, 5, and 7 middle mixed color. Paint squares 6 and 8 the darkest mixed color. Finally paint square 9 the darkest (original) color.

Step 4: Sketch and Design - Sketch several designs to add on top of the squares and then choose your favorite. *Make sure you like your sketch! Then wait for the squares to dry completely. Push the squares together to create a big square and carefully add your embellishment with a new color. (I suggest black or white)

Step 5: Hang your new artwork!