Saturday, 14 November 2015

RECIPE: Cinnamon Bites

Here is a recipe that a friend of mine has given me. She actually sort of forced me to try some of these that she had made at a time and place I would normally not to do so but she was quite confident that it was all worth it and I would not regret it. I had to give in and tried it there and then. She sure knew what she was talking about. This is a very quick and simple yet a pleasant recipe (and taste) requiring the minimum ingredients that it would be a shame not to share with you. The recommended cut size of the cookies make it even more desirable as you can just have a few or even a small handful with your coffee or tea and you are likely to feel satisfied without having to feel guilty about your indulgence. 
 
Recipe: Cinnamon cookies in bite sizes

Ingredients: 
1 packet (250g) unsalted butter (kept at room temperature)
1 egg
2 tablespoonsful of caster sugar
2 tablespoonsful of ground cinnamon
Self raising flour

easy, quick, and not much sugary cookies
Before baking

Method:

In a small to medium sized bowl, mix the sugar and the cinnamon and leave it aside.

In a large bowl, mix all the remaining ingredients. Add flour slowly until the dough becomes soft but not sticky.

Take pieces of the dough and make long rolls. The thickness should be about the thickness of an average index finger. Once baked, it shrinks in length and gets thicker a bit (see pictures above and below to see the difference of before and after baking).

Cut diagonally about an inch in length.

Bake in a baking paper lined oven tray in a preheated oven at 180C. When the colour changes to much lighter (see picture below) and the dough pieces are hard, turn off the oven and the tray out and let it cool a little. The idea here is that it is warm enough to make the sugar&cinnamon mixture stick but is cool enough not to melt the sugar.

Once it is at the right temperature (not hot, not cold), put a handful in the sugar&cinnamon mixture, roll them around by giving the bowl a gentle shake and then take them out. Keep repeating until all the remaining cookies are covered with the mixture. Once totally cool, you can place them in an air tight container and store them for weeks.

easy, quick, long lasting cinnamon cookies
After baking


Monday, 9 November 2015

Natural Grout Cleaner

Here is a recipe for a natural homemade grout cleaner. 

7 cups of water
Half a cup of baking soda
1/3 cup of lemon juice 
1/4 cup of vinegar

Method:
Mix all the ingredients in a spray bottle and spray the surface you need to clean. Wait for a few minutes and then scrub. 


Tuesday, 20 October 2015

Lunch Ideas for School Kids (6)

After a bit of a break, here I am with more lunch ideas for school kids for you. Don't get me wrong when I say 'ideas for kids', they could be just for anyone's outing or work day too, really. If someone made me these everyday, trust me, I would not complain at all! In saying that, it is true that I am the one that makes these for my kids every school day, but I just can't manage my time or energy around preparing one for myself too. Mine is often so much more boring. I know, it is disappointing. Hubby also gets quite jealous of our children's freshly made foods that are mostly homegrown or homemade, since the best he can get out of me is pretty much the homemade bread that I bake that he can make himself some sandwiches or toasts with. Oh no, thinking about it, it sounds a bit cruel. Anyway, lets not get into too much unnecessary detail here now and lets move onto the lunchbox ideas of this post.

1. Lunch and Snack
  • Cream cheese, chia seeds and linseed wraps
  • Red and green capsicums
  • Kiwi 


2. Lunch and Snack
  • Cream cheese, chia seeds and sunflower seed wrap
  • Red capsicums and celery sticks
  • Apple 
  • Mandarin


3. Snack (for two)

  • Avocado dip
  • Carrot sticks
  • Celery sticks


3. Lunch and Snack

  • Avocado and chia seed sandwich
  • Cucumber sticks
  • Capsicum sticks
  • Apple 
  • Banana


Thursday, 1 October 2015

Guest Post: Clever Storage Ideas to Organise Kids' Rooms

Patricia is a cleaning expert from Hire Cleaners Acton . She is always looking for creative and time saving ways to clean.


---

Organising your children's belongings can be a real pain. Considering that your kids probably have more stuff than you do, it is pretty challenging to find a place for every toy and every item in your kids' room. But luckily, nowadays shops offer such a wide variety of storage organizers that you only need to check them out and spend some cash. 

storage ideas
Photo Source

Wire Wall Bin
Keep your kids' favourite books in a visible and easy to reach place by stacking all reading material in a wire wall bin. Place it near the bed. Storing books in an easily accessible nook will encourage your children to read more.

The good thing about wire wall bins is that they are easy to clean. Put them under running water, add dish soap, sponge them and rinse.

Cabinet Storage
 If the cabinets are too overcrowded, make use of cabinet door storage. For example, store your kids' favorite video games in a homemade storage cart or a store-bought storage bag. In fact, using vertical storage is a clever trick to expanding your storage space.

Wipe down your storage cart or bag with a wet sponge or disinfecting wipes to keep it clean.

Shoe Racks
And speaking of vertical storage, how about you use over the door shoe racks to store not only your children's shoes, but also their toys and other belongings? Shoe racks come in many sizes and materials, so it's easy to get one that suits your preferences. And if one shoe rack doesn't do the trick, hang another one on the door of the closet/wardrobe.

Shoe racks need to be wiped down with a wet cloth on a regular basis.

Canvas Catch-all 
Use DIY catch-alls to store all your kids' tennis balls, footballs, yoga mats, baseballs, sneakers, baseball bats, tennis rackets and other sports equipment. Place them on the floor near a cabinet, at the side of the bed or by the window so they are within easy reach. If you want all these things out of sight, using a canvas catch-all is a great idea.

Depending on the type of catch-all you use, you can either machine wash it or spray it with an all-purpose cleaner and rub with a sponge.

Bench
Adding a small bench in your kids' room, probably by the window or – why not – at the foot of the bed will allow more storage space for your kids' stuff. Just to clarify – all the stuff can be placed under the bench and the seat itself can be used as additional seat storage. Keep as many items hidden and out of sight as you can. For example, you can place your kids' school books and materials, sports equipment and toys, not to mention some shoes.

Vacuum the bench on a regular basis to keep dust and dirt off.

Rolling Crates
Using rolling crates, storing your children's belongings has never been that easy. Use as many crates as you need and place them on the floor near a wall, desk or your children's beds. This is a great way to keep all the stuff within easy reach. Plus, moving the crates around the room is a cinch, which means you can rearrange them if you don't like where they are installed.

Items you can store in rolling crates include footballs, toys, sockets, books, stuffed animals, hats, cushions, etc.

You can make one yourself.

Use wood cleaner to clean your rolling crates.

Mesh Hamper/Laundry Basket Bag
Who says that laundry baskets need to be used solely for your dirty clothes? If you have a large pile of footballs, baseballs, stuffed animals or other bulky items, you can keep them in place by using a mesh hamper. That way, your children will be able to easily locate their stuff and take out the items they need without turning the room upside down.

Considering the bounteous supply of storage bins and containers available on the market, nowadays it's very easy to keep your children's stuff organized. Surf the net or make a trip to the store and buy the stuff you need. Or get crafty and make your own storage containers.


The article is kindly contributed by Hire Cleaners Acton

Monday, 14 September 2015

Guest Post: Backyard Landscaping Ideas and Tips

This article is granted by Ella A. an avid blogger, freelance writer and home décor enthusiast. She likes to write home maintenance, decoration, interior and exterior design, gardening and landscaping. Her greatest joy is to share helpful tips and advice with readers from all over the world.

---

If you have a backyard that feels utterly boring, then you can give it a nice makeover to turn it into something more welcoming and interesting. Regardless of the size of your yard or the property where your lawn and garden need to be improved, you can do so without too many issues involved. You can do a lot of good by working on said space, so let’s cover a few ways you can do this with the following tips:


·     Defining spaces
You need to decide which spaces you will really need, such as a lounge area, dining area, cooking area and more that would make your yard well-organized. Doing this can be as cheap as simply moving furniture around and placing accessories, so consider this and think about ways you can change the garden landscape.

·      Making a garden path
Adding a great-looking meandering path will create a more welcoming look to your otherwise fairly mundane garden space. It will take a bit of work, driving in stakes and considering the shape, then wrapping bender board around it. When the job is done you will have a great path you can enjoy on hot summer days and cold winter ones as well.

·      Using concrete
For anyone who has a concrete patio, there are some ways to make it more interesting that happen to be inexpensive and fairly quick. The first one is to coat the surface with some masonry stain in a color you like, something potentially warm for a more pleasant look. You may even work with a checkerboard pattern if you feel like it. A second option would be to set tiles over the concrete for a more welcoming and elegant look.

·      Using a trellis
You can see trellises in gardens and garden centers for most times, and they can add a lot of style to a place with the right approach. Placing one toward the back side of the garden as a focal point would be a great way of making sure you have this great addition to your garden space. A flowering vine planted on either side of it will add to its style and create a more welcoming environment.


·      Painting
For single story homes painting the back of the house in a different color would be a great way to add a different look without becoming too involved in gardening and renovation work. Make use of neutral shades such as beige, taupe, light gray and you will have excellent results.

·      The vertical approach
If you have a backyard possessing a larger lawn, then you can add some dimension by adding positioning boulders all over the place. You can arrange them individually or cluster them together, depending on how you want to see things. You should not be afraid to use the lawn to accommodate them, but you can leave some space around them to plant some colorful perennials.

·      Mulching
Laying on a similar-colored mulch on the flowerbeds will help give your entire area a unified look, while at the same time protecting your plants, making garden and lawn maintenance a much easier task.


Article written by guest blogger Ella Andrews on behalf of: Gardener Gardening Ltd. Photos supplied by the writer.

Monday, 31 August 2015

RECIPES: Olive Bread and more

Have I shared my Instagram account with you yet? It looks like I signed up a long time ago but never ended up using it after that one post that I made on the day at the time. Believe it or not, actually, I had to ask a friend of mine to send me my username details this year as I had no idea what I signed up as at the time. After I found 'me' on Instagram and worked out my log in details, I started to use it more often. I have shared the photo below there some days ago and am now posting the further details here. 

I now enjoy using Instagram and it has become another source of inspiration and help for me. In fact, just this morning, as I was going through some recipes from one of my favourite cook books called BREAD by Dean Brettschneider, I drooled over a recipe, Muesli Roll, and decided to give it a go before I realised that I had all the ingredients at home except for one. So, what did I do? I simply went on to Instagram and asked the inspirational baker Dean if I could replace that particular ingredient with anything and voila! He replied almost in an instant with all I needed to know, in detail too. Perfect! By the way, I have more baking and sewing related posts there if you want to check out. You are most welcome to add me to your following list if you wish to do so.

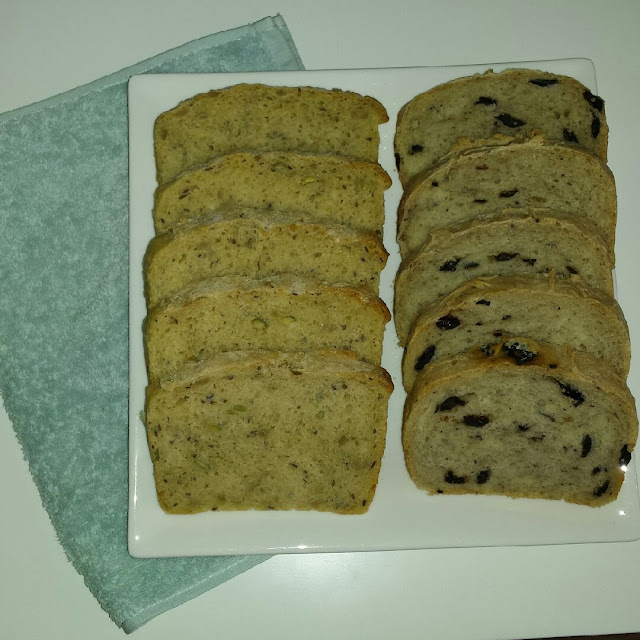
Here are some of my favourite and most often used bread recipes for you. The bread with seeds is an adaptation of my recipe and the olive bread recipe I had received from a friend of mine a while back. Both the recipes have never failed me so far and just between you and I, my recipes are generally 'if I can make it, so can you' type as I am still a pretty novice baker. 

Homemade olive bread and white bread with seeds

OLIVE BREAD

Ingredients:
- 3cups flour
- 1cup warm water (add a little more if needed)
- 2teaspoonsful instant yeast
- Approximately ¾ cupsful pitted black olive pieces
- 1 teaspoonful salt

Method:
Combine all ingredients and form ‘bread’ dough. Work it for approximately 6-10 minutes. Make a big ball with the dough and leave it in a large bowl. Cover it with plastic wrap and some kitchen towels to keep it warm. After about an hour or so, place the dough in a rectangle cake tin. Cover it up and wait at least for an hour to rise. Bake in a preheated oven (10-15mins before baking, turn on the oven at 200C) for 40-45 minutes.


BREAD WITH SEEDS

The loaf on the left was made with 3/4 organic plain flour and 1/4 with organic wholemeal flour. I have made it with some crunchy organic seeds which made the texture and the taste just amazing. Highly recommended. The recipe to this bread is here and the seeds I used for this particular time for this bread in the picture are;

* Pepitas (pumpkin seeds)
* Sunflower seeds
* Linseed
* Chia


Enjoy!

Monday, 24 August 2015

No Time to Waste, No Excuse to Make

I have always been one of those that find it hard to 'stand still'. I remember when I stopped going to work in the last week of my pregnancy with my first child and not being able to sit down and just watch something on TV even for one afternoon. I just could not do something that I had dreamt of many times when working full time, when I had the opportunity for it. I thought at some stage that it could be because of my nesting period at the time but later on, it was quite evident that I was just being 'me'. Oh well, it is not that bad, right?

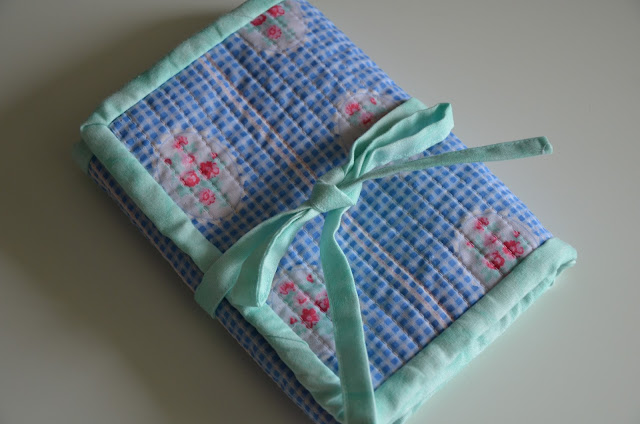
diy sewing kit

This year, I have a very busy schedule due to my commitments. It is so busy that I often utilise my waiting time that I get on a regular basis certain days of the week in the car as my reading or hobby crafting time. I also fit in some walking time in it too whenever I feel like it. So, those days that I am likely to get some time to kill (well, rather to wait in between two scheduled activities), I have my sneakers on (or somewhere in the car), have a book or two, a notebook or some scrap paper with some pens. As for crafting, I only bring something with me when I am able to organise a hand-crafting project that is small enough to carry around the night before to take with me the next day. When I do, depending on the amount of materials needed and the size of the project itself, I put everything I need in a small container or a larger box. It is OK, but I knew things could have been more compact and more mobile.

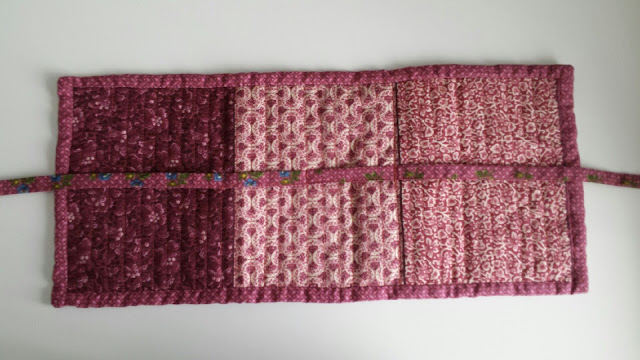
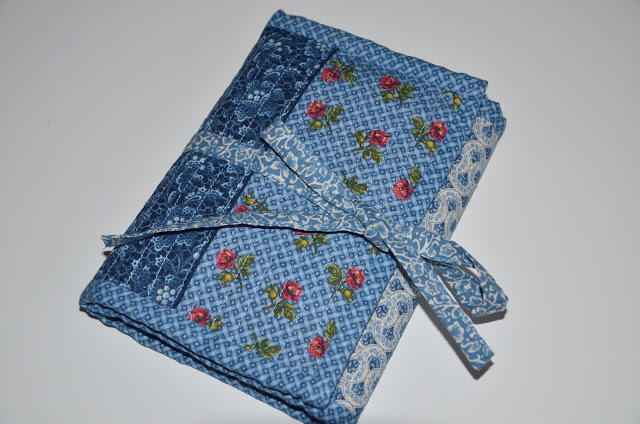
When I saw that 'Goody Goody Binding Kit' instagram photos (yay!, I have finally started using Instagram), I thought 'that was it'! I found the beautifully laid out tutorial of Vanessa Goertzen on her blog and voila! I made one too. Well, I started off with one, then made another, then another. It does take a bit of time to complete the project (and I must admit, the least joyful part of the whole project for me is that first fabric matching and cutting stages) but it just feels so good when you finish it. The possibilities are endless with it. I have made my own variations of the fabric placement and the inside design according to my own taste and needs but overall, the tutorial is a great start. Much recommended for anyone that is interested.

By the way, in case you haven't noticed, the over-grown strawberry and the flower are actually not just for the good looks. They are pockets. Isn't that clever of Vanessa to have come up with the idea?

Enjoy a fulfilling day!

binding kit

handmade crafting kit

portabel diy sewing kit

diy sewing kit with a zip


handmade binding kit

stylish sewing kit

unique binding kit

crafting on the go

portable kit for crafters

fabric crafting kit tutorial