 |
| Photo source |
Sunday, 30 December 2012
DID YOU KNOW ...(52)?
Thursday, 27 December 2012
A SUMMER TREAT: YO-S-CREAM
We are in summer here in Australia and we are trying to make the most of it, sensibly. As I have written here as well, our kids' diet is almost sugar free. They have good amounts of natural sugar in their foods such as fresh fruit but we have chosen to exclude the added sugar as much as we could in their early years in life. Mr. Junior has tried some sugary foods this year as his taste buds are pretty developed and he knows the difference between good and bad, healthy and unhealthy, all-time and occasionally. However, Miss Junior is still at a stage where she is not introduced to sugar including icecream.
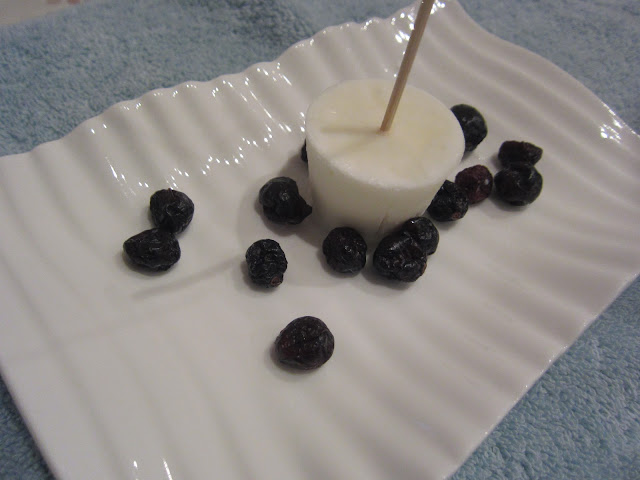
On hot days, we have come up with our own version of sugar-free icecream and we like calling it 'yo-s-cream'. In the pictures below, you can see our plain 'yo-s-cream'. You can also make it with fruit (such as berries and mangoes) mash.
The plain yo-s-cream has only one ingredient; natural yoghurt. (You can add your choice of fruit to it if you like). The materials used are a small freezer-safe container and a toothpick or a quarter of a skewer. Simply, just put some yoghurt into the container, put the toothpick in the middle and place in the freezer until frozen. You can serve it as is or with some fruit.
Enjoy something cool today!
Monday, 24 December 2012
Last Just Before the End Giveaway Results
Proudly announcing the lucky winners of the latest giveaway:
Both the winners and the sponsoring businesses are contacted regarding the results. Please check your e-mails.
- Margie Burke
- Emily Dick
Both the winners and the sponsoring businesses are contacted regarding the results. Please check your e-mails.
Sunday, 23 December 2012
DID YOU KNOW ...? (51)
 |
| Photo source |
Thursday, 20 December 2012
PLANTING TREES: Tips and More
Australia is an island continent that has a lot of water restrictions and high water bills as well known by most of us. Even though gardening is great in many ways, it can get quite dear as well. When planting, it is good to consider whether your plants are immune to drought and so forth. It is also wise to use methods and materials that will keep your soil moist for longer. Other ways of saving water are important too but here, I will share with you how we have chosen to plant our trees in a water-wise way.
We used a drainage pipe (as it makes watering easier, the use of water more efficient and is so much cheaper than many other watering solutions), water crystals and some mulch as our water-friendly materials.
First, Mr. Hubby dug holes where the trees were to go. We made sure that the holes as well as the tree roots were well soaked.
Then, we placed the drainage pipe making sure that it was long enough to have both ends out of the ground.
After that, we put some water crystals in the middle of the hole, around the pipe.
We also added some organic chicken manure with Blood & Bone.
We placed the tree in in the middle of the hole with the soil that it originally had. After this stage, we filled in the hole making sure that the tree was upright. We firmly patted down the soil on top. Then, we watered the plant generously with some seaweed mixture. (We repeated the application of the seaweed mixture about a week later as well.) Lastly, we layered some mulch (approximately 5cm thick) around the tree trunk and the pipe ends.
 |
| Tree planting - no mulch as yet |
All we need to do know is to water the trees (from the pipes) every few days. (We particularly try to water them the night before a hot day).
If you would like to read more about our garden tips and what we have been doing there this year, you can click here, here, and here.
Monday, 17 December 2012
LAST JUST BEFORE THE END GIVEAWAYS
As promised earlier, the giveaways have not ended yet. Here are three more gorgeous prizes for three lucky people (one prize per person) thanks to the sponsoring businesses.
Don't forget, one of the prizes is available only for the U.S. residents when the others are open worldwide. When entering, make sure you let me know which prize you would love to win.
Prize #2
Prize: $25 Gift Certificate for eDiaperCakes.com. The Gift Certificate will expire on 5/2014. U.S. only. Gift certificate will be emailed to the winner.
eDiaperCakes.com is a company that is U.S. business that makes diaper cakes for baby showers. They started a year ago when the owner of the website gave birth to girl and she wanted to create a business that would let her spend more time with her daughter. They have a selection of over 60 themed diaper cakes and they also sell Do-It-Yourself cakes in which you can decorate yourself. Some of their popular themed cakes include characters like the Hungry Caterpillar, Goodnight Moon, Peter Rabbit, Pat the Bunny, Winnie the Pooh, and much more.
So if you’re looking to buy one, they would make a great choice because they are fairly priced, have a great selection and their diaper cakes are hand assembled in 2 business days.
Links:
http://pinterest.com/
twitter.com/ediapercakes
http://www.facebook.com/pages/
Note: This offer (Prize #2) is open to the U.S residents only.
Link:
Prize: 1x size 000 trucks all around hand stitched singlet from Precious Ladybubs Boutique.
Hi! From Precious Ladybubs Boutique! Behind the scenes we are a team of 3 generations who all like to create unique items for your little princess or prince to wear and use. Precious Ladybubs began in July this year and we started out by making nappy case covers & hair clips. From then on we have since ventured into bracelets, headbands, taggy toys, baby singlets and dress! Just to name a few! Pop over to visit our range of gorgeous goodies
Note: This sponsoring business will be closed until the new year, so the winner will be able to claim the prize early in the next year.
Don't forget, one of the prizes is available only for the U.S. residents when the others are open worldwide. When entering, make sure you let me know which prize you would love to win.
Prize #2
Prize: $25 Gift Certificate for eDiaperCakes.com. The Gift Certificate will expire on 5/2014. U.S. only. Gift certificate will be emailed to the winner.
eDiaperCakes.com is a company that is U.S. business that makes diaper cakes for baby showers. They started a year ago when the owner of the website gave birth to girl and she wanted to create a business that would let her spend more time with her daughter. They have a selection of over 60 themed diaper cakes and they also sell Do-It-Yourself cakes in which you can decorate yourself. Some of their popular themed cakes include characters like the Hungry Caterpillar, Goodnight Moon, Peter Rabbit, Pat the Bunny, Winnie the Pooh, and much more.
So if you’re looking to buy one, they would make a great choice because they are fairly priced, have a great selection and their diaper cakes are hand assembled in 2 business days.
Links:
http://pinterest.com/
twitter.com/ediapercakes
http://www.facebook.com/pages/
Note: This offer (Prize #2) is open to the U.S residents only.
Prize #3
Prize: A sock monkey set: A hat/beanie and a diaper cover from Crochet Magik.
Hello. My small business is called Crochet Magik. I offer cozy warm in style crochet product for photo shoots to everyday wear from newborn to adult, simple as that. I just love the satisfaction it brings clients and their love ones. Crochet Magik is here to serve you! Please check me out Have a wonderful day. And thank you for participating.
Link:
Note: This offer is open worldwide.
Prize #4
Prize: 1x size 000 trucks all around hand stitched singlet from Precious Ladybubs Boutique.
Hand-Stitching Basics: How to Thread A Needle
Below are some easy to follow instructions that are both worded and pictured for beginners in hand-stitching. I must warn you starters that once you start stitching, sewing or crafting, you cannot go back! As long as you know a few basics, what you can do with that knowledge and skill is almost limitless and I am not even talking about fabrics yet. It is ADDICTIVE and this is how it all starts!
1. Preferably, cut your thread at an angle.
4. Wrap one or both ends of the thread around your forefinger (I used both ends in the pictures below).
5. Allow some lap-over of thread (about a quarter of an inch or just over half a centimeter)
6. With the help of your thumb and forefinger, roll the threads together and off the finger.
7. Pull your know towards the end of your thread and tighten by pulling it.
Sunday, 16 December 2012
GIVEAWAY RESULT: Just Before The End Giveaway #1
This giveaway was proudly sponsored by Milk Me and the winner of the gorgeous Howlite Natural Bracelet with baby's foot charm and tassel is Melissa Gottliebsen. Congratulations to Melissa and big thank you to each and every entrant. Don't forget, more giveaways are on the way and the next may be yours!
Saturday, 15 December 2012
Wednesday, 12 December 2012
A HOMEMADE WEIGHT TUTORIAL
As you most likely know by now, I have a handmade business called MADE BY Y that I operate mostly from home. I sometimes hold a stall at markets too. I generally have my spot indoors but it is not an option at times and last month, I had one of those outdoor markets. I do not own a marquee but a family member was kind enough to lend his to me for that day. The only issue was that his tent was not designed for concrete floors and I needed to make sure that it stayed firm and stable on a hard surface. That meant that I needed some weights for each leg of the marquee. I was tight on budget and time and had to come up with some homemade options.
or something l like this
but I have decided to go for a different weight option.
The first thing we did was to cover up the containers with the contact paper that we had bought. We didn't have to do that but it looked much nicer when we did it.
After that, we started getting our containers ready. Tip: You can put some rocks on the bottom of the containers if you don't have enough cement and that is just what we did to one of ours when we noticed that it was not going to be enough.
We placed the hook as seen in the picture above and put the hook through a small tree branch and hung it.
Then, we poured the cement into containers and put them aside over night to dry and in the morning, it was all ready to use! All I had to do on the day was to use some strong ropes to weigh down the marquee.
Feel free to let us know if you have other ideas/options that you use or can think of in the comments section.
I could have gone for a solution similar to the one in the pictures below,
but I have decided to go for a different weight option.
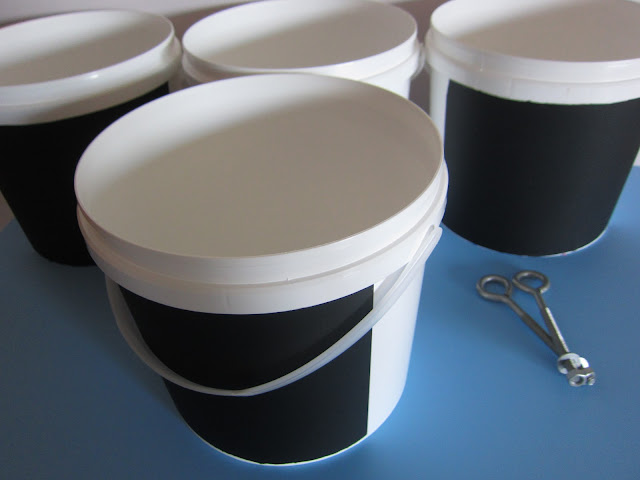
I happened to have some 5lt plastic containers at home. We bought some self adhesive contact paper to cover the writings on the containers, 4 hooks (we used whatever scrap horizontal metals that we had around to stop the hook from getting out), and a packet of (20kg) concrete premix from a hardware store and it all cost us just over $10.
The first thing we did was to cover up the containers with the contact paper that we had bought. We didn't have to do that but it looked much nicer when we did it.
After that, we started getting our containers ready. Tip: You can put some rocks on the bottom of the containers if you don't have enough cement and that is just what we did to one of ours when we noticed that it was not going to be enough.
We placed the hook as seen in the picture above and put the hook through a small tree branch and hung it.
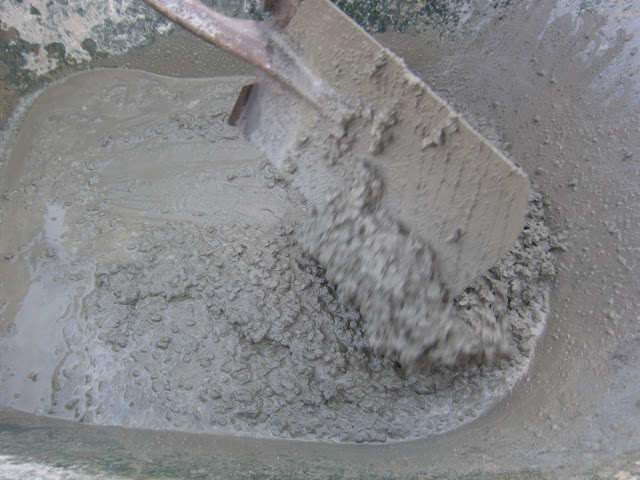
Mr. Hubby made cement using water and the concrete mix.
Feel free to let us know if you have other ideas/options that you use or can think of in the comments section.
Tuesday, 11 December 2012
JUST BEFORE THE END GIVEAWAY (#1)
There will be some sponsored giveaways one after the other just before the year ends as a way to celebrate the end of 2012. First giveaway prize is sponsored by MILK ME.
Note: Please leave a valid e-mail address in the comments section below so that I can contact you if you are the winner.
a Rafflecopter giveaway
About Milk Me:
Milk Me is a proudly Australian owned and operated family business. We provide organic solutions for breastfeeding mothers and organic clothing for babies from birth to 12 months. We are passionate about providing the highest quality organic cotton and trendy outfits for your babies.
Links:
Giveaway Item:
1 x Howlite Natural Bracelet with baby's foot charm and tassel (see picture below)
10mm stones
Ship to Australia Only
Postage Included
a Rafflecopter giveaway
Sunday, 9 December 2012
DID YOU KNOW ...(49)?
Grazing animals such as cows, deer, antelopes and giraffes chew their food, swallow it, partially digest it in their stomachs, then barf the large pieces up, chew again and swallow them again. It is called 'rumination' and the animals that do it is called 'ruminants'. Some say that they have four stomachs but in reality, they have four compartments/parts in their stomachs.
Thursday, 6 December 2012
DELICIOUS HOMEMADE VEGETARIAN FOCACCIA
Here, I will be sharing one of our family favourites today. It is our speciality and an all-time-winner for picnics and family outings specifically. It is a bit time consuming because of all that peeling and cutting as well as cooking; however, it is a dish that you cannot go wrong with and it is also great because you can make a big batch and store in the fridge for later use (to be used within the following week). It can be used as a cold salad with or without the addition of some baby spinach leaves or you can make focaccia or a sandwich with it. We often use cabatta but you can use whatever type of bread that tickles your fancy.
By the way, if you ever see some people anywhere in Victoria drooling over and eagerly biting into some huge homemade sandwiches as a family of four at a park, it is probably us :-)
While I am full and even though my mouth has already watered can still handle looking at the photos here, I should get going with the recipe.
Ingredients:
- Your choice of vegetables that can be roasted (we often use whatever we have at home at the time. Our favourite vegies for this recipe are pumpkin, sweet potato, eggplant, zucchini, and red and green capsicums. You can also use some beetroots, carrots and onion rings too. You don't have to have them all at once, you can pick and choose according to your taste and the amount of each also depends on your choice and availability of them at the time).
- Some olive oil
- Herbs (we prefer using Italian herbs but you can use your favourite herbs. Oregano, basil, garlic, thyme and rosemary particularly go well with this dish).
- Garlic cloves (optional. Goes well if you are going to make a salad with this dish but if you are going to use it as a sandwich filler, then I would skip it).
Method:
Wash, peel (if applicable) and slice your vegetables. The slices can be large in size but they should not be thick as it would make the cooking time longer. It is also important that the thickness of different vegies is similar to each other so that they cook evenly. Once your vegies are all sliced, place them in a baking tray. I prefer placing some baking paper on the tray before putting the vegetables but it is optional. Then, drizzle some generous amount of olive oil and sprinkle your herbs over them. This dish does not need any salt. Cover the top with some aluminum foil and roast in a hot oven until they cook. Once they are caramelised, voila!
Enjoy something special with some loved ones today!
Note: The pictures below show how much fun Mr. Junior and I had while getting our vegetables ready for roasting.
Tuesday, 4 December 2012
A FRESH START IN THE GARDEN
I have been writing about our new garden adventures recently. Even though this is the third post of mine on this topic after this and that, this was actually what we did on one of the first days after taking the plunge on the transformation of our garden.
We had some big old native gum trees in the garden and they started posing a risk for us in the last few years and we noticed it better after one of them broke in half on a stormy day last year. We were lucky that it didn't cause a huge issue as it only landed on our washing lines and damaged that only while we were all asleep at night. It could have been much worse. This was one of the main reasons why we preferred not to keep them any longer. There were a few other reasons too.
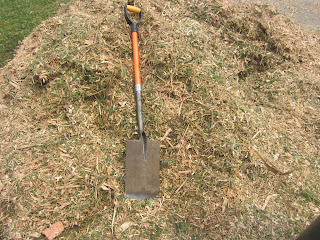
We contacted a few places regarding tree cutting and mulching and decided to work with the company (Mets All Tree Cutting Service) that offered us the best deal. One morning, the owner, Paul, and his assistant from Mets company came, cut our three big trees, mulched them, cleaned the area and left within an hour. We asked them to leave the mulch with us as we wanted to use it in the garden. They couldn't bring their work machine to our backyard, so the mulching happened at the front yard and we transported it to the backyard later on the day.
After they left, another company started its work in our garden. This time, it was Sontec (0409 695 927) that came in and using their small excavator removed all the roots and dug up the whole area which had lots of old root pieces, stones and large rocks, which we separated from soil using our handmade tool later on.
Now, our garden has so much more usable space that we have already started utilising excitedly. Stay tuned to see what else is happening there!
We had some big old native gum trees in the garden and they started posing a risk for us in the last few years and we noticed it better after one of them broke in half on a stormy day last year. We were lucky that it didn't cause a huge issue as it only landed on our washing lines and damaged that only while we were all asleep at night. It could have been much worse. This was one of the main reasons why we preferred not to keep them any longer. There were a few other reasons too.
We contacted a few places regarding tree cutting and mulching and decided to work with the company (Mets All Tree Cutting Service) that offered us the best deal. One morning, the owner, Paul, and his assistant from Mets company came, cut our three big trees, mulched them, cleaned the area and left within an hour. We asked them to leave the mulch with us as we wanted to use it in the garden. They couldn't bring their work machine to our backyard, so the mulching happened at the front yard and we transported it to the backyard later on the day.
After they left, another company started its work in our garden. This time, it was Sontec (0409 695 927) that came in and using their small excavator removed all the roots and dug up the whole area which had lots of old root pieces, stones and large rocks, which we separated from soil using our handmade tool later on.
 |
| The stones that we have saved from our garden before distributed evenly. |
Sunday, 2 December 2012
DID YOU KNOW ...? (48)
On average, a person living to 75 years of age will have slept approximately 23 years of their life (about 220,000 hours).
Subscribe to:
Comments (Atom)


-1.jpg)


